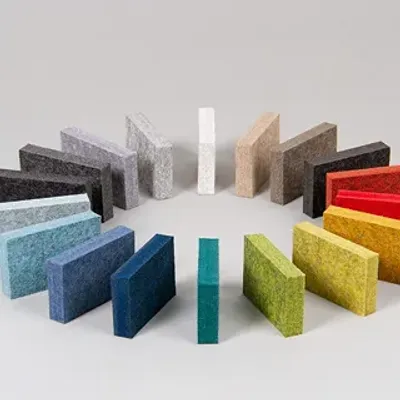
Fabricants et fournisseurs de panneaux en bois naturel de haute qualité en Chine. Nous produisons : Panneaux acoustiques en bois Panneaux en PET
Si votre demande n'est pas traitée dans les plus brefs délais, veuillez indiquer votre adresse WhatsApp/Skype dans le message, afin que nous puissions vous contacter dès la première fois.
Nous vous répondrons dans les 24 heures. En cas d'urgence, veuillez ajouter WhatsApp/WeChat : +86-13678899682 directement.
Rooms echo. Voices get lost. Meetings, calls, or music sound harsh. With the right panel method, you can installer l'acoustique solutions cleanly and fast—no mess, no guesswork.
To attach panneau acoustique products to walls, pick a mounting method that fits your room and wall type: removable command strip tape for renters, impaling clips pour panneaux en mousse, Z-clips for heavy panel systems, or adhesive/screw fixing on solid walls. Measure, mark, and press the panel onto the wall for secure results.
We’re a professional manufacturer in China producing high-quality PET and wood acoustique solutions for global B2B clients. Below, I’ll show practical, field-proven steps our installers use worldwide. Use it as a simple home improvement playbook you can hand to your crew—or follow yourself for small projects.
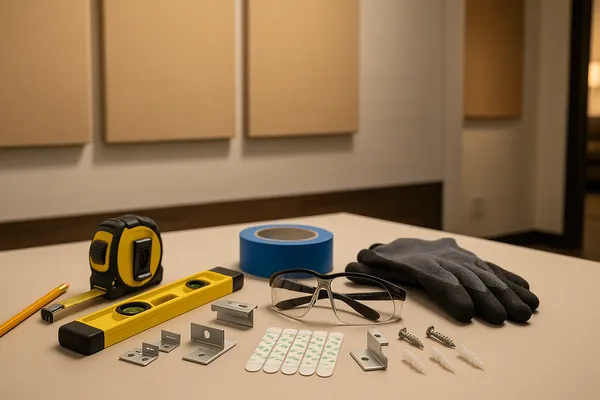
Before you hang acoustic products, gather a basic kit so each panel goes up straight and stays put.
Essentials
Quick tip: Unbox each panel and let it relax flat. Wipe the wall surface so adhesive or tape bonds well.
Looking for options sized for offices and meeting rooms? See our panneaux muraux acoustiques overview for PET boards and thickness choices. Explore PET polyester acoustic panels for walls.
Different rooms and panneaux muraux need different fixes. Here’s a simple guide you can use to choose the best method:
| Room / Need | Method | Pros | Cons | Typical Cost per panel |
|---|---|---|---|---|
| Rental office, classrooms | Removable adhesive/command strip | Fast, easily removable, no holes | Lower load; may damage delicate paint | Low |
| Studios, call rooms | Impaling clips (for panneaux en mousse) | Quick, reliable | Leaves small screw holes | Low |
| Auditoriums, corridors | Z-clip method (using Z-clips) | Very secure, like a picture frame | Precise alignment needed | Medium |
| Busy hallways, tough walls | Adhesive + screw | Maximum hold | More steps; patching on removal | Medium–High |
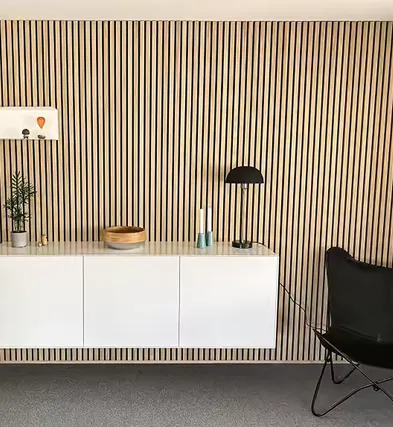
Want decorative surfaces for reception or lounges? Our panneaux acoustiques en lattes de bois combine sound control with warm visuals. See slat panel designs for feature walls.
If you rent—or you just want to keep paint tidy—go with removable adhesive. High-quality command strip options (e.g., 3M) make the panel easy to put up and able to remove later without damaging finishes. Press each panel onto the tape for 30–60 seconds. Check the bond before letting go.
Pro note: These tapes are great for lightweight panels in offices, pods, or phone booths. Heavy panel systems or textured surfaces may damage the paint or wall if overloaded—so follow weight limits.
Need a renter-friendly PET option? Browse our panneaux acoustiques en feutre d'animal de compagnie for lightweight choices that still reduce sound. PET felt wall collections for quick upgrades.
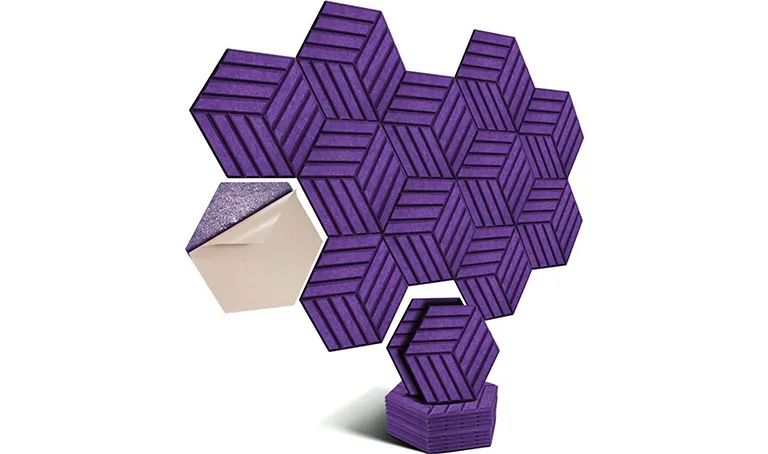
Le impaling clip method uses small metal impaling clips with spikes. You screw the clips to the wall; then push panneaux en mousse ou fibre de verre cores onto the spikes. Add a bead of adhesive on the back of the panel for extra safety. This suits booths, edit bays, and small studios.
Steps
For textured looks with real wood, see our mur acoustique en bois lines—wood grain meets performance. Acoustical wood wall systems for signature spaces.
Le z-clip method (également appelé using z-clips) is our go-to for heavier panel assemblies and long corridors. One rail mounts on the wall; the other on the back of the acoustic board. Lift and drop to lock—secure mounting in seconds, like a picture frame.
Why use it?
Designing reception ceilings too? Pair wall systems with panneaux acoustiques pour plafond to control flutter echo in larger rooms. Ceiling-ready PET boards and sizes.
Utilisation glue ou construction adhesive for quick installs on smooth paint. On busy corridors, add a couple of screw fixings to back up adhesives. For heavier panels, “butter” a thin adhesive bead and press the panel onto the wall evenly.
If you want a “soft-touch” visual, our acoustic panels for office collections mix color and texture with clear, simple panel hardware. Office-friendly wall and art patterns.
Yes. On brick walls, use masonry anchors or a batten grid: fix timber battens across the span, then mount des panneaux tels que a cladding layer. On painted surfaces, test a small area; some tapes or adhesive may damage soft paint. When in doubt, choose Z-clips or screw-through cleats.
“We treat each wall like a new project. We test bonds, confirm loads, and pick the cleanest fix for that finish.” — Our site supervisor
For moisture-tough spaces, consider PET models designed for harsh environments. Durable decorative PET panneaux d'insonorisation.
Good panel layout beats guesswork. Start at first-reflection points and work out. On parois latérales of a meeting room, put the panel where voices bounce. For larger halls, treat both murs et plafonds planes to control bounce and flutter.
Coverage basics
Decor-forward spaces? See panneaux acoustiques décoratifs that blend PET cores with patterns and colors. Design-led absorbers for front-of-house.
Simple tools go a long way. Score PET with a sharp knife, or use a circular saw on stacked sheets; always wear PPE. When hanging art-style boards from rails, a discreet hanger can help align heavy frames before the final drop.
Checklist
Our team can pre-cut and label panel bundles to speed your crew’s work. If you want to install a full corridor or lobby, ask us for shop drawings and numbered sets.
Acoustics made easy. A treated panel turns ondes sonores into heat by absorption, cutting reflection from hard surfaces so speech pops and music sits right. PET, fibre de verreou mousse acoustique cores do this. Thicker cores help on low frequency problems; thin layers are great for mid/high chatter.
One line rule: place more panel where people talk or where you hear obvious glare—corners, long flat runs, and hard glass lines. For a wood look with performance, see wood wall panels crafted for both style and control. Natural-warm finishes with true l'absorption acoustique.
Home theaters benefit from a simple “front-to-back” sweep. Start at the screen wall, then treat first reflections on side lines. A row behind the seats tightens dialog. In a trial room, panel installation took half a day; panels mounted cleanly with Z-clips and two helpers.
Steps we followed
For compact rooms, mousse acoustique tiles are handy. In one booth, we pushed each panel onto spikes via the clip system, added adhesive on the back of the panel, and finished trim cuts fast. If you’re putting acoustic treatment behind fabric, PET sheets are light and easy to handle.
Speech clarity vs. coverage (typical mid-size meeting room)
Coverage  | Expected RT60 (s)
10%       | ||||||||||  ~0.9
20%       | ||||||||    ~0.7
30%       | ||||||      ~0.55
40%       | |||||       ~0.45
These are typical results our teams see in offices after we installation de panneaux acoustiques and tune placements. Actual numbers will vary with furniture, glass, and ceilings.
If you need art-style pieces, you can mount acoustic panels in frames for gallery corridors. We can pre-assemble framed sets like a picture frame for quick drops on site.
If you need panels that look like art, you can pick patterned PET designs and “float” them from the wall. We ship labeled sets worldwide and support your crew live during installation.
Can I attach panels on glass or tile?
Yes—with caution. Use rail or Z-clips set into the ceiling or side jambs rather than direct adhesives on fragile surfaces.
What if I want to move them later?
Choisir removable adhesive/command strip for small boards or Z-clips for larger units; both are able to remove with minimal repair.
De combien de panneaux ai-je besoin ?
Start with 20–30% wall surface area treated in busy rooms, then add more panel coverage where you still hear reflection ou bounce.
Will panels make my room soundproof?
No. Panels absorber le son inside the room; they don’t block it. To reduce sound leaving the room, consider doors, seals, and mass layers.
Can I cut panels on site?
Yes. Score PET or use a circular saw. Always measure with a tape measure and test fit first.
Do I need an installer?
Many customers installation de panneaux acoustiques themselves. For large sites or tricky panel alignments, our field team can assist or pre-fabricate kits.
We design and build PET and wood systems daily for distributors, architects, and contractors. That means quick quoting, shop drawings, consistent color runs, and fast global shipping. If you want to install a full office or a chain of meeting rooms, we supply numbered panel packs, hardware, and simple guides so your team moves fast—without damaging finishes or schedules.
Note: This guide draws on our field installations across offices, schools, and home theaters. If you want to install the panels in a complex venue, ask our engineering team for a layout plan and hardware schedule tailored to your site.