High-Quality Natural Wood Panels Manufacturers and Suppliers In China. We product: Wood Acoustic Panels PET Panels
Avoid your inquiry is delay response, please enter your WhatsApp/Skype along with the message, so we can contact you at the very first time.
We will reply you within 24 hours. If for urgent case, please add WhatsApp/WeChat: +86-13678899682 directly.
Echo makes rooms feel harsh. It hides detail and tires ears. Tapes, nails, and guessing don’t fix it. Use proven mounting methods and smart placement to turn noise into clarity—safely, cleanly, and fast.
The best way to hang acoustic panels is to use a French cleat for secure, level mounting and to leave a small air gap for stronger sound absorption. Plan reflection points, mark heights, fix mounting hardware, and place the panel so it’s stable and square. For light pieces, high-bond adhesive or impaling clip systems can work, but cleats are strongest and easiest to re-level.
As a professional manufacturer of PET and wood acoustic panel systems serving global B2B clients, we install in factories, schools, offices, and studios every week. Below is a comprehensive guide drawn from first-hand site experience—simple enough for first-timers, detailed enough for pros.
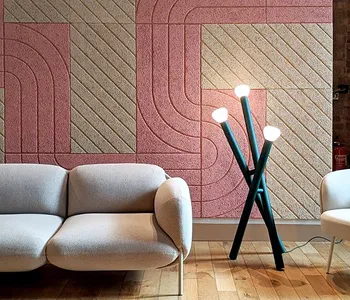
Acoustic panels work by converting sound waves into tiny vibrations within the fibrous core, turning energy into heat you cannot hear. This lowers reverberation, improves speech clarity, and makes rooms feel calm. The right acoustic properties turn harsh rooms into comfortable ones.
In practice, panels absorb sound most where early reflections hit—typically the side walls near speakers or people. That’s why planning room acoustics comes first. Durable PET felt and wood-faced options deliver reliable sound control while keeping the space beautiful and easy to maintain.
When coverage and placement are right, you improve sound quality dramatically—music feels natural, speech is clear, and you improve the sound across the seating area without over-deadening the room. For deeper bass, add a bass trap in corners later.
“Treat first reflections, then add coverage until the room feels right. Small changes, big wins.”
Consider learning more product options here: see our polyester fiber acoustic panels for versatile, cleanable PET solutions that suit commercial projects.
acoustic panels
If you want to hang panels correctly on a wall or ceiling, follow this step-by-step guide:
That short step-by-step plan avoids crooked rows and keeps cable routes clear for walls and ceilings. For commercial work, PET felt panels are lightweight and easy to handle; explore PET felt acoustic panels if you need quick, clean installs.
A french cleat gives the strongest hold and perfect leveling. It’s a two-piece system: one half of the cleat goes on the wall, the other on the back of the panel. Hang the panel on the cleat, then micro-adjust left or right. For framed wood units, secure at the top of the frame to keep lines crisp.
An impaling clip uses sharp tines that pierce PET or fiberglass; you press panels onto the clip for quick installs. Command strips are fine for very light pieces and temporary setups. For wood slat or heavier panels, cleats or a metal bracket set is safer. If you prefer a simple picture hanging approach, choose rated hooks with safety cables.
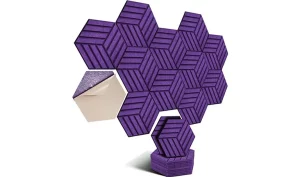
Need design-forward fluted faces? See acoustic wood slat wall panels and mount them with brackets to the wall or cleats depending on weight and substrate. This is also where you might mount acoustic units in a pattern and use mounting acoustic panels rails for long runs.
First, place acoustic panels at reflection points—halfway between speakers and listeners on the side walls, plus the wall behind the speakers or stage. Add coverage behind listeners if the room still rings. To get the best sound, keep symmetry.
Next, leave an air gap (even 20–50 mm) behind each panel; an air gap behind increases low-mid absorption. Panels a few centimeters away from the wall behave “thicker” than their physical depth. If you must choose one spot, treat the first reflections to reduce comb filtering.
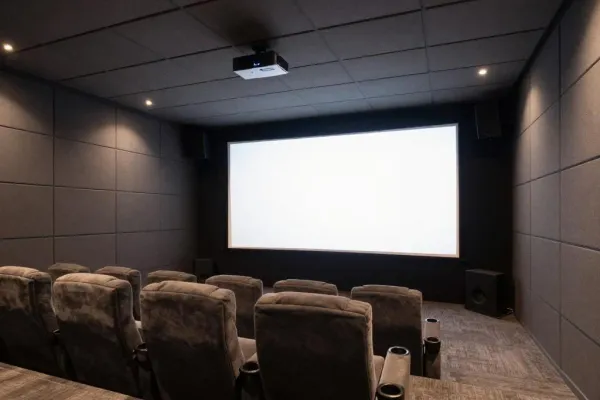
Before drilling, plan where to place acoustic elements relative to screens, signage, and lighting. For cinema and home theater, see dedicated designs like acoustic panels for home theater with tuned cores and low-glare finishes for projection rooms.
Yes. Many systems let you apply panels without holes. High-bond adhesive tapes or construction glue can work for light PET, letting you install acoustic panels without damaging painted surfaces. On drywall, always test a small area first.
If removability matters, prefer cleats or clips so panels are attached to the wall but still serviceable. Avoid gluing panels directly on fresh paint; the wall surface needs to cure. For meeting rooms, see acoustic panels for conference room where installers balance clean walls with flexible layouts.
Remember: the installation of acoustic materials should follow building policies and fire codes. When in doubt, use mechanical fixings that can be patched later.
light PET panels with high-bond adhesive tapes
Ceilings are powerful. Acoustic panels on the ceiling intercept overhead reflections and tame flutter reverberation between floor and roof decks. Use clouds or continuous ceiling panels in rows. In open offices, consider acoustic ceiling baffles or ceiling tiles around luminaires and sprinklers.
Routing cables, HVAC, and fire lines demands planning, so choose suspension kits rated for the load and seismic zone. For light-filled atriums or shared spaces, hanging felt panels create soft zones without closing rooms.
Adhesive options are fine for light PET. For wood-faced or heavier panels, switch to cleats or brackets. Avoid solvent adhesive that can bleed through felt; test first. Mark, dry-fit, then press the panel into place only when confident.
If you must glue, spread beads on the back of the panel and set spacers for your air gap. For security corridors and schools, mechanical fixings are best—panels are less likely to be disturbed, and the panels are installed uniformly across the corridor run.
For curated decorative lines, browse wood veneer acoustic panels—these panels offer both design and performance with tidy mounting lines.
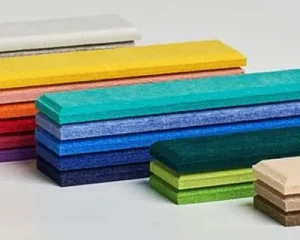
Acoustic foam panels (and other foam panels) are light and affordable, good for first reflections in small rooms. PET felt and wood-faced acoustical panels are more durable, cleanable, and available in varied finishes for public spaces and high-traffic corridors.
Among the different types of acoustic panels, PET felt excels in schools and transit halls; wood slats suit executive spaces. Choose the right type of acoustic solution for your audience and cleaning regime. For wall art that doubles as treatment, see acoustic wall panel art.
Foam is not soundproof; neither are most soundproofing panels you see advertised. They control reflections and sound transmission to a degree, but doors, glazing, and structure matter. Start with coverage, then improve doors and seals if needed. Proper sound panels complement—not replace—good construction.
Use this field-tested list when you install the panels. It keeps crews aligned and efficient.
Those step-by-step instructions prevent surprises and finish faster. For branding or wayfinding, coordinate colors by zone. In reception and lobbies, accent with PET shapes that guide visitors while they reduce noise from foot traffic.
Treat reflections first. If boomy notes linger, add a bass trap to corners or rear walls. Corners collect low energy, so thicker units help. In theaters and music rooms, start with front and side reflection control, then add corner depth.
For creative zones, PET clouds and baffles over tables cut glare and tighten original sound. Add safety cables and keep clouds clear of sprinklers. Over desks, small clouds enable focused work while keeping teams connected.
Don’t glue panels directly on wet paint. Don’t skip test fits. Don’t mix metric and imperial heights in the same room. Use straight edges to keep seams clean and rows parallel.
For framed wood runs, set the cleat so the top of the frame aligns across the wall. When using cleats, remember one half of the cleat mounts on the panel, the other on the wall. If spanning long lengths, consider aluminum rails to keep lines tight over uneven substrates.
If you prefer lightweight solutions, command strips can hold small PET in classrooms or rentals. For long corridors with many units, rails and mounting brackets speed repeatable installs. Where projects call for decorative baffles, see acoustic panels hanging styles that combine pattern and performance.
Mounting method comparison (typical guidance from field installs):
| Method | Tools needed | Typical weight rating | Pros | Cons | Best use case |
|---|---|---|---|---|---|
| French cleat | Level, drill, screws | High | Strong, re-levelable, reusable | Needs accurate layout | Long runs, wood faces |
| Impaling clip | Drill, screws | Medium | Fast, hidden | Not ideal for very heavy units | PET felt, quick retrofits |
| High-bond adhesive | Caulk gun, rollers | Low–Medium | No holes, quick | Hard to remove; substrate dependent | Rentals, light PET |
| Brackets/rails | Drill, anchors | High | Aligns rows, spans uneven walls | Visible in some designs | Corridors, panel arrays |
Coverage vs perceived echo (illustrative):
Coverage %     │ Echo / Harshness (lower is better)
10%            │██████████
20%            │████████
30%            │███████
40%            │██████
50%+           │█████
Tip: Start at ~20–30% wall area in lively rooms; increase until speech is easy. Always match to specific acoustic goals and occupant density.
PET felt balances performance and cleanability. Wood slat adds warmth and diffusion in executive spaces. Hybrids combine a PET absorber with wood faces for the “best-of-both.” Choose based on traffic, cleaning, durability, and design language.
For durable public spaces, see sound absorbing panels in PET felt. For premium lobbies, explore acoustic slat wood wall panels. These choices align with acoustic needs like speech privacy, paging clarity, and music detail.
On production lines, we pre-cut cleats and include screws so crews stay fast. Our carton inserts list the panels include items inside—cleats, screws, stand-offs—so nothing is missing on site. For safety, we label substrates and fastener types on the box.
We test panels for abrasion, cleaning, and color fastness. Field teams note fewer snags when crews pre-mark stud lines and avoid busy conduit routes. For schools, we favor mechanical fixings; in galleries, adhesive plus safety pins keeps panels tidy while protecting finishes.
If you need durable décor plus performance, browse our decorative acoustic wall panels—they act as art while they absorb sound waves and keep spaces welcoming.
Align top edges, not floors, in case slabs are out of level. Keep equal spacing between acoustic wall rows, and maintain consistent reveals at doors and glazing. Use a story stick or laser level for speed.
Around screens, leave access for ports and power. Keep panels around control hardware removable. In boardrooms, balance treatment such that speech remains lively, not dull. A tuned mix keeps the room’s character while reducing glare.
For offices, our office acoustic wall panels offer finishes that match furniture lines and keep teams productive.
Check anchors and bracket ratings. Use toggles for hollow walls and masonry anchors for block. On structural spans, screw into studs or furring. When you install the panels, verify that sprinklers, exits, and signage remain clear.
Avoid blocking thermostat sensors and return grilles. Keep corridors code-clear. Where fire ratings apply, choose certified assemblies. Finish edges cleanly so fibers don’t snag.
If any panel must be moved later, cleats let you lift it onto the wall again with no fuss. This also makes swapping art-face PET easy during brand refreshes.
What’s the safest way to keep lines level across a long hall?
Use a laser and set your wall cleats first. Hang the first unit, then string a line to keep each panel square. Rails help when rows are long or substrates vary.
How much coverage do I need to reduce echo?
Start at 20–30% of the major surfaces and add more if speech is still tiring. Coverage needs depend on ceiling height, furnishings, and occupancy.
Can I put acoustic panels on walls that already have art?
Yes. Mix sizes, keep reveals consistent, and use cleats so you can rearrange without patching. Combine décor and treatment with printed PET where needed.
Will panels block Wi-Fi or HVAC?
No for Wi-Fi; materials are not conductive. Avoid grilles and thermostats. Keep clearance around sprinkler heads as required by local code.
Do I need different panels for a studio vs an office?
Studios benefit from thicker cores and home theater style placement. Offices prioritize durable finishes and speech comfort. Either way, plan first reflections and add as needed.
Can I do diy acoustic panels?
Yes—simple frames with PET felt cores work well. Just follow weight ratings, test fixings, and wear eye protection during woodworking and cutting.
One last thing: If you plan to install acoustic panels across multiple sites, standardize fasteners and heights so crews move faster. For hospitality and transit projects, coordinated finishes speed approvals and keep maintenance simple.
Field note from our install team: When panels are attached to the wall via cleats, crews move 30–40% faster on repeat floors—less layout time, fewer surprises, cleaner lines.