High-Quality Natural Wood Panels Manufacturers and Suppliers In China. We product: Wood Acoustic Panels PET Panels
Avoid your inquiry is delay response, please enter your WhatsApp/Skype along with the message, so we can contact you at the very first time.
We will reply you within 24 hours. If for urgent case, please add WhatsApp/WeChat: +86-13678899682 directly.
Living or working next to an existing wall that leaks noise is exhausting. You hear voices, calls, or TV. You lose focus. You sleep badly. The worst part is feeling stuck because the wall is already finished. The solution is a smart plan: combine soundproof wall upgrades with the right acoustic panels.
Acoustic panels can’t fully soundproof an existing wall by themselves, but they can make a huge difference inside the room by cutting echo and improving clarity. For real soundproof results, you usually need to seal gaps, add mass (often drywall), add damping, and sometimes add insulation or decouple the wall assembly—then use acoustic panels to fine-tune the room.
To soundproof well, you need to name the enemy. Most complaints are airborne noise: speech, TV, barking, office chatter. This type of noise moves through cracks, outlet openings, and light wall layers, then it fills the room. If you mainly hear words clearly, it’s airborne.
The second enemy is vibration. Think bass beats, door slams, heavy footsteps. Vibration can travel through the stud wall, floors, and ceilings. Even if you add more drywall, vibration can still “bridge” through framing. That’s why some high STC walls still feel weak on low bass—STC focuses on airborne sound and does not fully reflect low-frequency problems.
The third enemy is flanking paths. Sound may not be coming straight through the wall face. It can sneak around the wall through the ceiling, ducts, a door, or even a shared outlet box. When clients tell me “I upgraded the wall but the amount of noise didn’t change,” flanking is often the real story.
Let’s keep this simple and honest. Soundproof means blocking sound from moving from one room to another. Absorption means reducing echo and reflections within the room. These are different jobs, so they need different tools.
Here are the core principles of soundproofing I use when guiding B2B projects:
A key “physics” fact that helps you explain upgrades to buyers: Mass Law says transmission loss often improves by about 6 dB when mass doubles (real builds vary, but the rule is widely used).
Quote you can reuse in sales conversations:
“Every time you double the mass of a barrier, you typically gain around 6 dB of transmission loss—so adding mass is powerful, but it’s not magic. To push further, you also need sealing, damping, and sometimes decoupling.”
Here’s the clear answer your buyers need: acoustic panels do not replace true soundproof construction, but they can still be a major part of a complete solution.
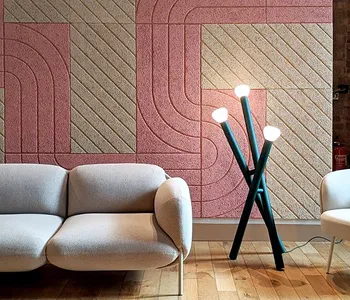
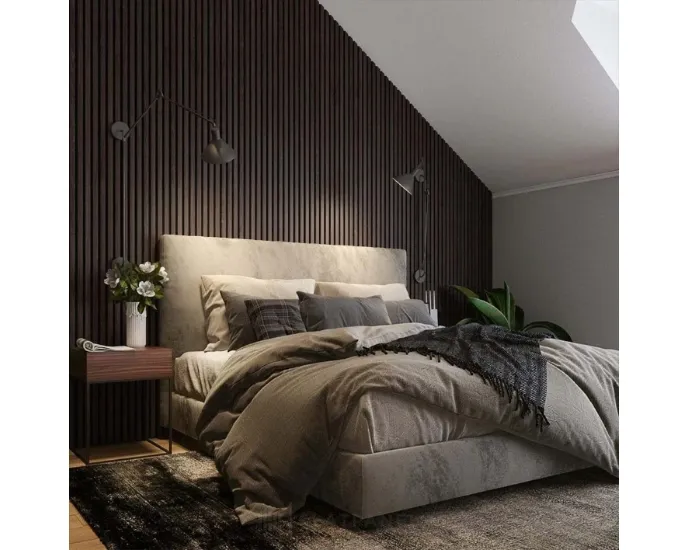
Acoustic panels (PET panels, wood slat panels, and other absorbers) mainly reduce reflections in the room. That means better speech clarity, less ringing, less fatigue, and better comfort. This is why designers love them: they improve how the room feels immediately.
But if the goal is to soundproof an existing wall so the next room can’t hear you, you usually need mass + sealing + damping (and sometimes insulation and decoupling). Think of it like this:
As a China-based acoustic panel manufacturer, this is where we help B2B buyers the most: we don’t just ship panels. We help you design a package—soundproofing solution + acoustic finish—so you can offer a real “project-ready” system.
Can acoustic panels soundproof an existing wall
If you want walls without removing finishes, start here. These steps are cheap, fast, and they often deliver the first noticeable noise reduction.
Fast checklist (low disruption):
This is the best starting point for existing walls without removing anything major. It’s also the most missed step. In real projects, I’ve seen expensive materials fail because small cracks were left open. This is why we always talk about “blocking airborne noise” as a system, not a single product.
For many retrofits, the most practical way to soundproof existing walls is to add mass. And the most common mass layer is drywall.
If your wall uses standard drywall and the noise is speech, adding a new layer of drywall can help a lot. A second layer of drywall can help even more, especially when you add damping compound between layers. The goal is simple: increase the mass of a wall so it vibrates less.
This is also a good moment to explain the word “soundproof.” Many professionals avoid promising total silence, because “sound proofing” suggests inaudibility. But buyers still search “soundproof,” so we use the term and set realistic expectations.
DRYWALL
MLV is flexible mass. People love it because it sounds high-tech. In reality, it’s one option to add mass without thick building materials. Mass loaded vinyl can be useful, especially when thickness is limited and you still need more “block.”
Here’s how I frame it for contractors and importers:
If you can add more drywall easily, drywall is often the simplest value.
If you need mass but want less thickness, mass loaded vinyl can fit.
Either way, seal edges and avoid rigid bridges.
A common working stack is: MLV + drywall to an existing wall + sealant. You’re basically adding mass to the wall plus better airtightness. Just remember: MLV is not the whole story if the problem is low-frequency vibration. STC doesn’t fully capture bass issues, so don’t rely on one number.
Insulation is the quiet hero. In a stud wall, insulation reduces resonance inside the cavity (also called the wall cavity). It helps reduce hollow “drum” behavior, especially in speech frequencies.
If you can open the wall (renovation), this is straightforward:
But what if you want without removing drywall?
You may use a drill-and-fill method (small holes, blow-in material, patch). That can work for some existing wall types, but results depend on workmanship and what’s inside the cavity already.
What about spray foam or closed cell foam? They can seal air, but they can also create stiff connections. That stiffness may not be ideal for some acoustic goals. If your goal is “soundproof existing walls,” I usually prefer fiber-based insulation plus mass and sealing, because it’s predictable in common wall assembly designs.
When clients say, “We need more soundproofing,” that’s when decoupling enters.
Decoupling means you break the vibration path. You do that by building a new wall in the front of the existing wall, leaving a small gap, and then adding insulation and mass layers. This is one of the most effective soundproofing approaches for a loud neighbor or a sensitive meeting room.
A simple decoupled approach:
Yes, it costs more space and labor. But it’s often the best soundproofing path when a thin add-on fails. If you’re working with a party wall in apartments or hotels, this is a common upgrade path.
B2B buyers need clarity, not hype. Two ratings show up often:
Also note: NRC runs from 0 to 1.0, and many acoustic materials fall roughly between 0.3 and 0.95 depending on thickness and design.
| Material / System | Main job | Helpful rating | Best use case |
| Added drywall (mass) | Block sound | STC (assembly) | Speech privacy through a wall |
| Mass loaded vinyl (MLV) | Add flexible mass | STC (assembly) | Thin retrofits needing more mass |
| Insulation in cavity | Reduce resonance | STC (assembly) | Stud walls, hollow partitions |
| Acoustic panels (PET / wood) | Absorb reflections | NRC | Offices, classrooms, studios within the room |
| Decoupled wall assembly | Break vibration path | STC + real-world feel | Bass + strong noise through common wall |
This is the honest “wall soundproofing materials” map. It prevents wrong purchases and helps buyers feel safe.
PET acoustic wall panels
Here’s a simple plan you can sell as a package. It also makes your content rank because it matches how people actually search: “learn how to soundproof,” “best way to soundproof,” “soundproof an existing,” and “soundproofing a room.”
Ask: is it voices, music, or impact? Low frequency bass needs decoupling more often.
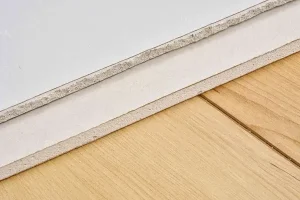
Seal gaps, outlets, joints. This is the core “walls without removing” step.
Add a new layer of drywall. Consider a new layer of drywall plus damping compound, or even a second layer of drywall if needed.
Use insulation to calm the cavity and reduce “hollow wall” sound.
Build a new wall or use resilient systems. This is the “need more soundproofing” level.
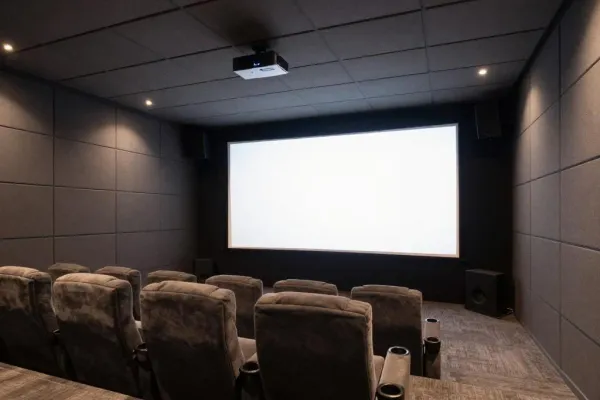
Now install acoustic panels to control echo and improve comfort. This is where we, as a manufacturer, help you win projects:
And yes—buyers ask for “soundproof curtains” too. They can help reduce reflections and drafts, but they won’t replace real wall upgrades.
Goal: Block sound through the wall (soundproof) -> Seal + Mass + Damping + (Insulation) + (Decouple)
Goal: Make the room calmer (acoustic comfort) -> Acoustic panels + layout + coverage
A contractor had a training room next to a corridor. The room sounded loud even with normal speech. They sealed cracks, added drywall to an existing wall, and then used PET acoustic panels on the room side to reduce reflections. The result was better privacy outside and clearer speech inside—without needing to remove the drywall completely. This is the practical “soundproofing solution” approach most projects can afford.
Acoustic panels mostly absorb reflections inside the room. They improve clarity and comfort, but they do not fully soundproof a wall by themselves. For true soundproof results, you need sealing, mass (drywall), damping, and sometimes insulation or decoupling.
Often the best way to soundproof is: seal gaps + add mass (a layer of drywall) + damping. If the wall is a stud wall, add insulation in the cavity if you can.
Yes. You can seal leaks and add a new layer of drywall directly to the wall. You can also add MLV behind the new drywall in some systems. This is a common approach for existing wall soundproofing.
STC helps compare airborne noise performance, but it doesn’t fully reflect low-frequency bass issues. If the type of noise includes bass, consider decoupling and full wall assembly design, not STC alone.
NRC is a single-number average of sound absorption coefficients at key mid frequencies (often 250–2000 Hz). Higher NRC usually means better absorption for speech clarity and reduced echo within the room.
Sell it as a two-part solution: (1) wall upgrade kit (seal + mass + insulation/decoupling options), and (2) acoustic finishing kit (PET/wood panels with a coverage plan). This gives a complete solution to soundproofing that buyers understand and trust.